Wednesday, 10 December 2008

Banana n Mango Muffin

This recipe marks the last baking for the first wave of my muffin mania series. As much as I enjoyed baking the muffins, I also enjoyed eating them and sharing with friends, in addition to the fun learning process of the this first wave. I am quite sure that I am going to go for a few more waves on muffins before I really call it a quit, there is simply too many things I can do with muffins, and I have not even started with chocolate muffins at all, so stay tuned!

For this last round of baking, I thought it would be a good idea to finish up what ever ingredients I had left, with the over-riped banana left the most, and a mango that I bought a couple of days back sitting around with no specific purpose yet. Hence, I decided to throw this two fruits together for this recipe...

Getting on with the recipe, the fundamentals of muffin are pretty much the same:

2 eggs
1 cup buttermilk
1 1/2 cups of packed brown sugar
3 bananas (mashed)
3 cups of self-raising flour
60ml of melted butter
1 tsp of salt
1/2 a large mango (mashed)
1 tsp cinnamon powder
1 tsp baking powder

Topping (optional)
lots of golden syrup
1/2 a large mango (sliced)
1 banana (thinly sliced)

yields - 18

Method
1. Preheat oven to 350 degrees F (175-190 degrees C) and place the oven rack in the middle of the oven. Butter a 12 - 1/2 cup muffin pan or line with paper muffin liners.

2. Combine the mashed banana and buttermilk in a small bowl. Stir in the melted butter and cinnamon powder, set aside for 10 minutes.

3. In another bowl, combine mashed mango, baking powder and lightly beaten eggs, set aside.

4. Combine the flour, salt and sugar in a large bowl. Add the wet ingredients into the dry ingredients and stir with a metal spoon until just combined (do not over mix).

5. Spoon the batter into prepared muffin pans. Bake in preheated oven for 25 minutes or until a skewer inserted into the centres comes out clean. Remove from oven and turn onto a wire rack.

6. To dress up the muffins, simply squeeze some golden syrup on the top of the muffins and top with a slice of mango and banana each. Place the muffins in fridge for a while to allow golden syrup to slightly thicken (frozen) up.

7. Serve immediately or when desired.

To get a variation of banana and mango tastes over the muffin, try adding the banana mix first, mix once, and then add the mango mix and mix again. This would make different parts (lumps) of the muffin have different mixture of ingredients and the two strong mango and banana tastes would not be overly mixed up.

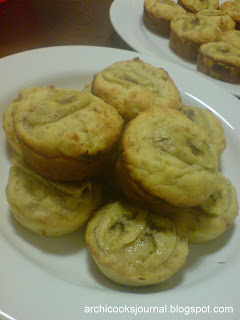
As usual, I like to finish up with close up shots of the muffins to show the texture of the muffins, and allow you to imagine how would it taste like in your own mouth, is your saliva dripping already? =p

Till next time, enjoy!


Sunday, 7 December 2008

Orange and Poppy Seed Muffin

Speaking of muffins, one almost immediately relates to orange and poppy seed muffin, if not blueberry muffin, hence I thought it would be good to include one of the 'hot picks' in my culinary journal, hence this post. As for the blueberry, it would have to wait until the next round of muffin-baking frenzy *laughs*

With this time's baking, I went frenzy with the icing and decorating, and really enjoyed the entire process, if architecture was as simple as this, life would be a lot easier and happier! The sense of achievement that architects always propagate is simply a lot easier to achieve with culinary arts!

I will not try to shy away from saying that this post is more about dumping nice pictures to readers than to push for the recipe, but indeed, the recipe itself was really nice, the texture and was spongy enough, and it was not too sweet, with the icing acting more of the overall sweetener rather than the sweetness coming from the muffin itself.

Now that I mentioned how good is the recipe, it seems somewhat wrong not to include it, so here it is:

1 cup of buttermilk
2 1/2 cup of self-raising flour

1 cup of caster sugar

120ml butter (melted)

2 eggs
2 tsp finely shreded orange rind

100ml fresh orange juice
1 1/2 tbsp poppy seed
2 oranges


Icing
1/2 cup icing sugar
1 egg's white
1 tbsp orange juice


yields - 12


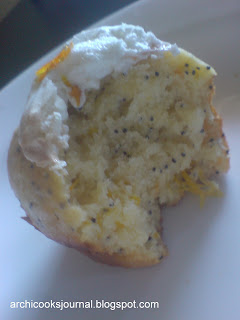
Another closeup, is your saliva dripping already? =)

Another closeup, I reckoned that the icing might not last long, hence I made the icing to be meringue, baked it for a while and it turned out quite well as well. This way, it could also last longer, a good thing as we were not in a hurry to finish all of them immeditely.

Method
1. Preheat oven to 350 degrees F (175-190 degrees C) and place the oven rack in the middle of the oven. Butter a 12 - 1/2 cup muffin pan or line with paper muffin liners.

2. Combine the poppy seeds and buttermilk in a small bowl. Set aside for 10 minutes.

3. Combine the flour and sugar in a large bowl. Add the poppy-seed mixture along with butter, egg, orange rind and juice, and stir with a metal spoon until just combined (do not overmix). If you have extra oranges, throw in large chunks of orange cutlets or pieces, that would give the muffins another dimension.

4. Spoon the batter among prepared muffin pans. Bake in preheated oven for 25 minutes or until a skewer inserted into the centres comes out clean. Remove from oven and turn onto a wire rack.

5. For the icing, beat the combined egg white and orange juice until fluffy, add the sifted icing sugard bit by big while beating constantly, use an electric mixer if necessary. Beat to form a firm and smooth, white foam which does not fall apart when bowl is turned.

6. Top muffins with meringue, add some finely sliced orange rind, done, serve as required. It is fine if you do not want to bake the meringue, otherwise just pop it in the oven at 200 degrees C for 5 minutes, or until the meringue turns lightly brown. Remember not to overbake as the texture of the muffine will be affected as well.

Closeup, notice the lightly browned meringue.

The moment of truth, eating time!

Yum yum... the eating continues...

one left... and...

Another big bite! Ok, that's it, there is no point showing you an empty plate right? Enjoy!


Saturday, 6 December 2008

Cooky Quotes

"Moms are the best cooks in the world!"
Archicook - ChenSen Au
Tags: ,

Moist Banana Muffins

This is another recipe I tried out the very next day after the previous muffin baking, but obviously laziness has delayed me from posting up this one. Hopefully I can gain some momentum in my work as soon as possible as my summer course starts tomorrow! Anyway, check out this recipe, I bought heaps of over-riped bananas and certainly put them to some good use. *proud*

Ingredients:

1/2 cup of butter
1 cup of buttermilk
1 cup of sugar
2 eggs
5 over-riped banana (1 1/2 is for topping, optional)
(maybe only 3 is requried if you were using the large Queensland bananas)
1 tsp vanilla extract
2 1/2 cups of plain flour
1 cup of self-raising flour
1 tsp salt
2 tsp baking powder
1/2 tsp soda bicarbonate
1 tsp lemon juice
1/2 tsp cup of granulated nuts (feel free to use any other chopped nuts you prefer)

yields - 18


Remember to check the heat level you are using if you preheat the oven at a higher temperature, I almost burnt my first batch of muffins when baking them at 200 degrees Celcius, luckily I saw noticed it later on turned it down, saved the muffins from turning into charcoal!

As you would have noticed, the muffins laid on top in the picture on top has a darker skin, almost burnt the whole batch of them! The top bit and the inside of the muffins were fine though...

Method
1. Preheat oven to 350 degrees F (175-190 degrees C) and place the oven rack in the middle of the oven. Butter a 12 - 1/2 cup muffin pan or line with paper muffin liners.

2. Mash 3 medium bananas with a fork, cream together with vanilla extract, butter and buttermilk, Beat in the eggs, salt, baking powder, soda bicarbonate and lemon juice. In another bowl, mix sifted flour and self-raising flour. Stir the flour mixture into the wet mixture (or vice verse) alternately until mixture is just combined.

3. Slice 1 1/2 bananas to about 1 cm cutlets, fill muffin cups halfway, add a slice of banana, add another layer of batter to cover and seal off the banana and batter below. Top with another thin slice of diagonally cut banana (optional).

4. Bake about 20-25 minutes or until a toothpick inserted in the center comes out clean. Place on a wire rack to cook for 5 minutes and then remove muffins from pan.

5. Serve warm or reheat when required.


Time to eat...yum yum...


Thursday, 4 December 2008

Apple n Oats Rasberry Jam Muffin

Its around times like this when my postings just cant keep up to pace with my baking, with one more recipe to post and another coming up tonight, I am wondering when will I get to finish posting all these recipes!? Nevertheless, determined to bake one recipe every night this week, I think the ones who will really benefit are those who really read this blog and try out the recipes (not forgetting the ones who eat the muffins, laughs*)

Today's post is a slightly more healthy one, apples and oats, what else can a weight watcher ask for? If you really want to watch that belly, throw in wheat flour and muesli as well, that will really top of the nutrition for this recipe. As for now, I will stick to just apples and rolled oats, and let the other guilt-laden senses (strictly related to taste buds only) overwhelm the notion of being healthy.

The muffins fresh from the oven, looks like adding the self-raising flour certainly has made the muffins 'puff'. This simply proofs the previous recipe to be workable and quite successful! "Excitement!*

Leave the muffins to cool for about 5-10 minutes before removing from the tray, place on wire rack to further cool it down.

The muffins posing for a good shot, I actually thought of posting all the pictures of them posing, but finally decided not to, considering there were too many of them. I think I should restrain myself from taking food pictures obsessively, it is starting to take up a lot of space in my storage hard drives.

Just before I forget, here is the recipe used this time, I am considering to make another come back on apple muffins some time in the future, and I might just improvise from here or something:

2 large eggs
2 cups of flour
1 cup of self-raising flour
1 1/2 cups of buttermilk
1 cup of sugar
3 tsps of baking powder
1 tsp bicarbonate soda
1 tsp lime juice
2 apples (skinned and grated)
1 cup of rolled oats
2 tsps cinnamon powder
1 1/2 tsp salt
2 tbsp butter
1/4 cup of raspberry jam of your choice + extra 24 tsp

yields - 24 muffins

Method

1. Preheat oven to 350 degrees F (175-180 degrees C) and place the oven rack in the middle of the oven. Butter a 12 - 1/2 cup muffin pan or line with paper muffin liners.

2. Cream together the butter, buttermilk, raspberry jam and sugar. Beat in the eggs, salt, baking powder, soda bicarbonate and lemon juice. In another bowl, mix sifted flour, self-raising flour and cinnamon powder with rolled oats and grated apple. Stir the flour mixture into the wet mixture (or vice verse) alternately until mixture is just combined.

3. Fill muffin cups halfway, add a tsp of jam, make sure you make it bulge and not spread over the whole batter to make it easier to seal later on. Add another layer of batter to cover and seal off the jam.

4. Bake about 20-25 minutes or until a toothpick inserted in the center comes out clean. Place on a wire rack to cook for 5 minutes and then remove muffins from pan.

5. Serve warm or reheat when required.

Finally, the true moment the next morning, where the muffins are teared apart with white steam oozing from each torn bits... *Yum Yum* To reheat, just chuck the muffins into the microwave oven for a minute or a bit more, remember to thaw them for abut 10 minutes or preferably more if you took them out from the refrigerator.

Another close shot, I think the microwave has vaporized the jam fillings, I shall try it fresh from the oven next time, otherwise, I might have to add custard powder to thicken the fillings, preventing them from turning out as it is now.

As you might have noticed, I did not have fillings for all of the muffins, but I think having that extra filling makes the eating process more interesting, so do chuck in it there when you do try out this recipe. I simply could not fill every muffins as I ran out jam halfway through the process.

Enjoy!

*The End*


Wednesday, 3 December 2008

Cinnamon Sugar Muffins

After the first two come-backs on baking muffin, I continued exploring the Internet for inspirations and ways to improve my baking techniques, when I came across this website called Joy of Baking, it almost instantly came across my mind: "ah hah! This is it!" I actually think that all bakers should visit that website at least once (now included in my foodie list), as all the content published in it has a lot of thought and considerations put into it. As for those who just started baking, I think the tips and techniques explained in the posts will definitely help to improve your (and my own) baking!

Moving on from the discoveries and findings learnt from Stephanie, I moved on to write and improvise recipes, as usual. This time around, I started off with something less complicated so that I can test some techniques mentioned in Joy of Baking.com, the result? Walah! I personally thought the quality of the muffins have improved significantly! Give it a shot, I think muffins are hard to get wrong with once you mastered the basic techniques, what more, it is a simple cinnamon sugar muffin, it is easy as 1-2-3. =)

The muffins just came out fresh from the oven, I was removing them but they turned out to be too hot, hence I left it for a while, could not resist myself from taking a photo...

The ingredients are as following (improvised from muffinrecipes.net):

2 medium eggs.
1 cup of self-raising flour.
2 cups of plain flour.
1 cup of buttermilk.
1 cup of sugar.
5 tbsps of butter.
5 tbps of shortening.
3 tsps of baking powder.
1 tsp of soda bicarbonate.
1 tsp lemon juice
1 tspn of salt.
1/2 tspn of nutmeg.

Topping:
1/2 cup of melted butter.
1/4 cup of castor sugar
1/4 cup of brown sugar
1 tablespoon of cinnamon. (or more)

Yields: 12 crown muffins


Method:
1. Preheat oven to 350 degrees F (175 - 180 degrees C) and place the oven rack in the middle of the oven. Butter or spray with vegetable oil spray a 12 - 1/2 cup muffin pan.

2. Cream together the butter, the shortening and the sugar. Beat in the eggs, salt, nutmeg, baking powder, soda bicarbonate and lemon juice. Stir in the flour and milk alternately until mixture is just combined.

3. Fill muffin cups to the top.

4. Bake about 20-25 minutes or until a toothpick inserted in the center comes out clean. Place on a wire rack to cook for five minutes and then remove muffins from pan.

5. Blend together the castor and brown sugar together with the cinnamon powder. Dip each muffin in the melted butter. Roll each muffin in the cinnamon sugar blend, I only did this to the top of the muffin as I did not want the muffins to be too sweet.

The muffins coated with cinnamon sugar blend, beware weigh watchers!

I tried to capture the texture of the muffins in this photo(above), but the lighting was really bad, nevertheless I posted it as the contrast between the front back muffins was interesting (from my point of view).

I tried taking photos of the muffins again in the morning, obviously there was not much left on the plate, you could imagine where they went over the night, not me! but my housemates! Laughing*

Another shot of two muffins together, the lighting in the morning helped a lot with the photos, maybe I should try using white light when taking photos at night, when I bake...

The final shot before it went into my stomach, look at that texture of the muffin! Thank you daylight!